Welcome to the My EV Charger app (V2.0.1). This manual walks through every function step by step: download and installation, registration, adding your charger, cloud connection, charging, card management, settings, charging modes, scheduled charging, OTA updates, language and privacy.
Safety Notice
Read before using the app. EV charging involves mains voltage. Incorrect installation or configuration can cause electric shock, fire or equipment damage.
- Installation and wiring must be carried out by a qualified electrician. Do not open or modify the charger yourself.
- Keep grounding detection enabled. Only turn it off temporarily under special circumstances, and restore it as soon as possible.
- Before enabling DLB, confirm the maximum grid current with your electrician or power supplier – a wrong value can overload household circuits.
- Select the power grid system that matches your installation (TN/TT by default; IT for U.S. dual-live supply without neutral). A wrong selection disables protective functions.
- ECO / ECO+ require a solar PV system and CT installed in advance by a local authorized installer.
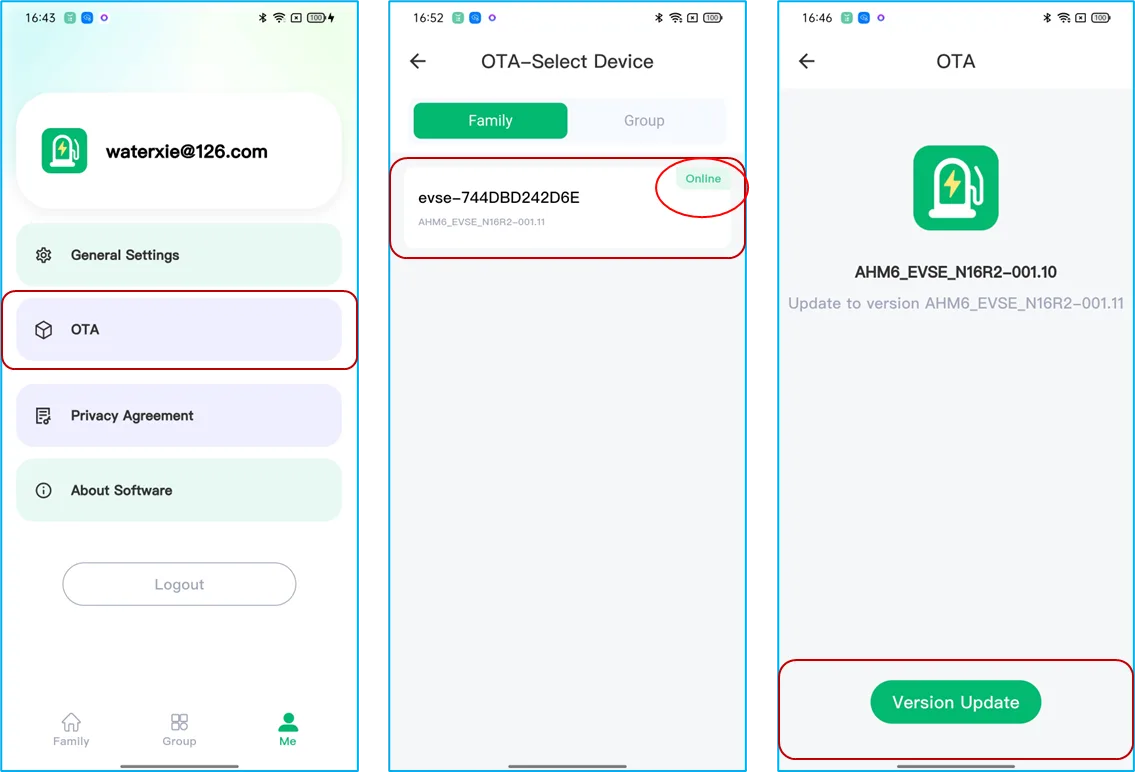
- During OTA upgrades, keep the charger powered and on a stable Wi-Fi connection; do not switch it off until the upgrade finishes.
- Confirm the connector is securely locked in the vehicle before remote-starting a charge from the app.
1. Download and Install
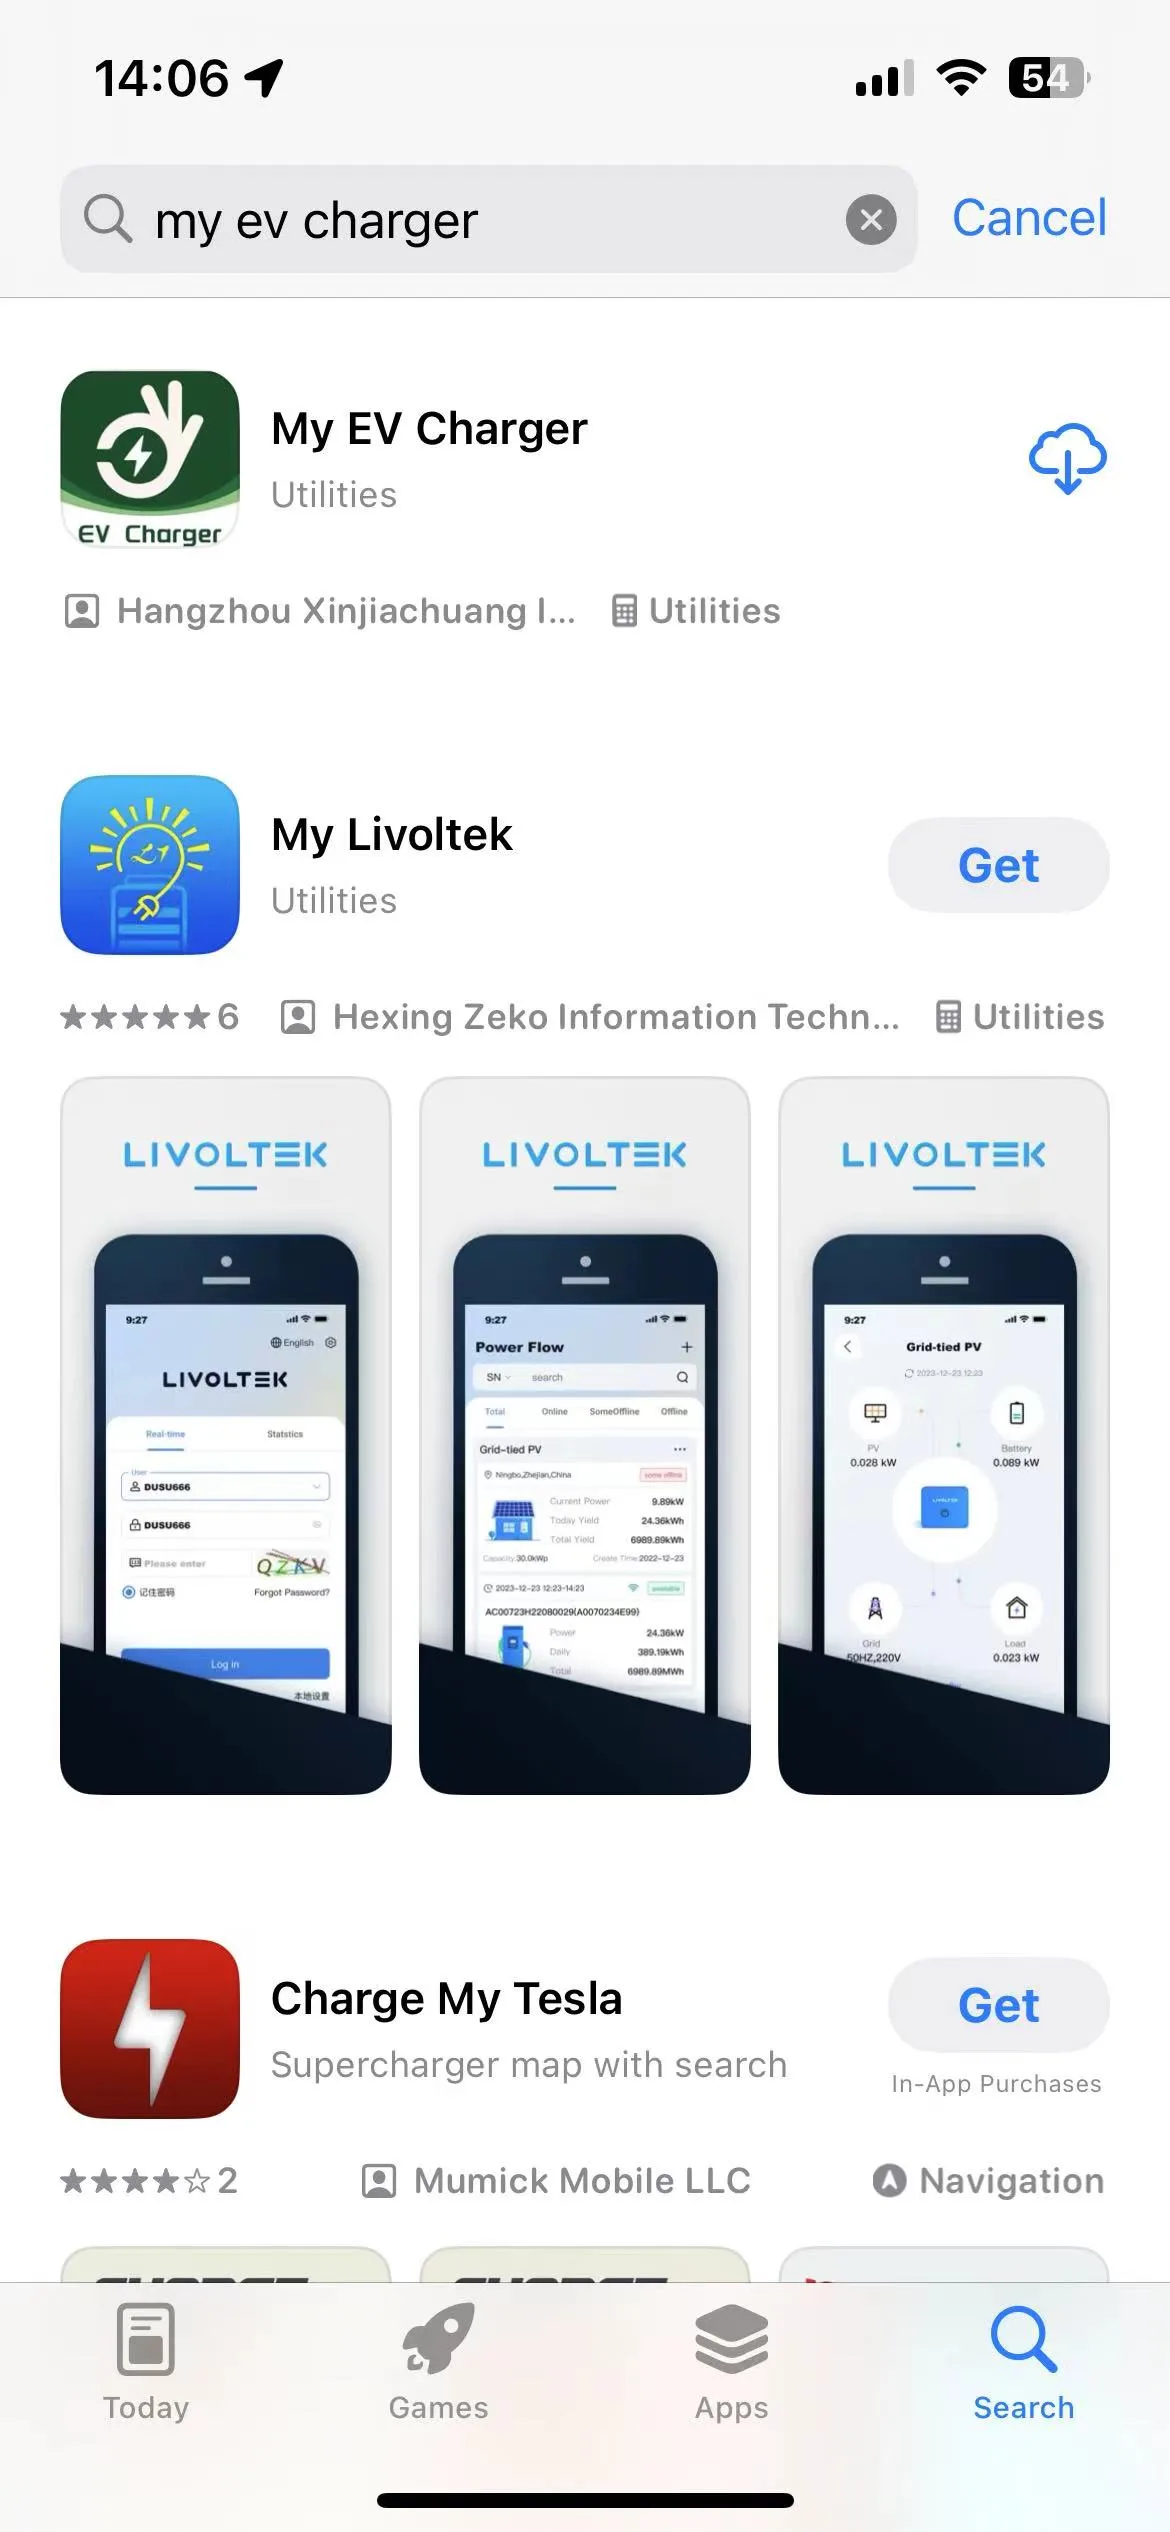
You can search for and install My EV Charger from the iOS App Store, or use a browser to scan the QR code below to download the app.
Scan the QR code to download the app:
2. User Registration
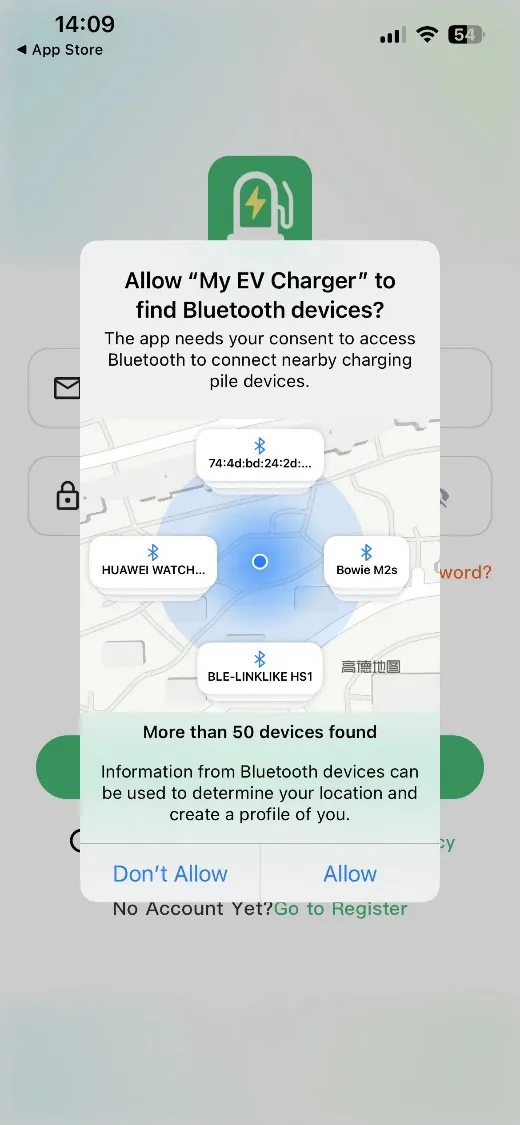
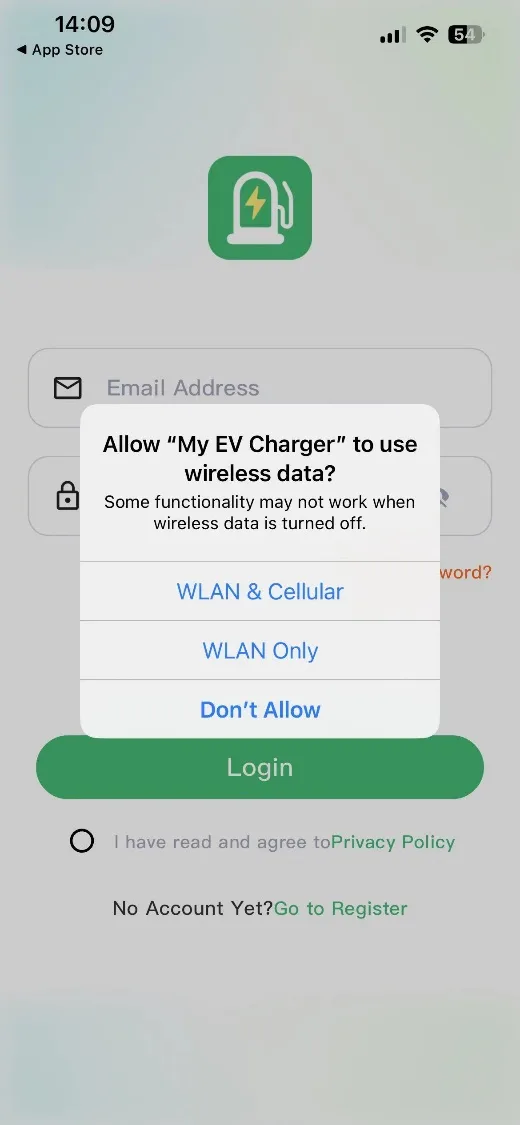
2.1 Phone authorization setting
- Allow the app to find Bluetooth devices.
- Allow the app to use wireless data.
2.2 Register and login
Register a new account first, then log in with the same account to use the app.
3. Add Charger
The app supports adding and activating your charger via Bluetooth or by scanning a QR code. Just select “Add Charger” in the app and follow the prompts.
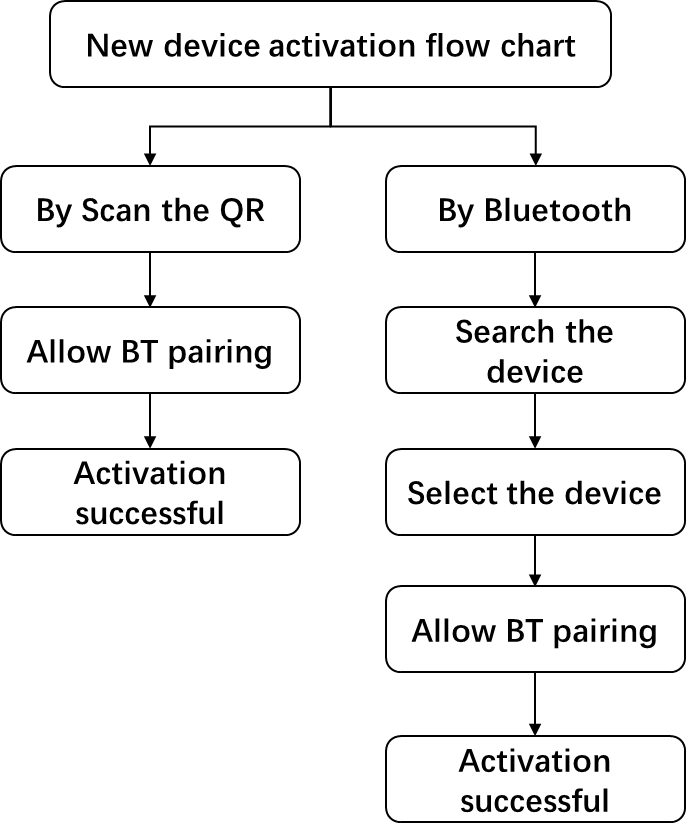
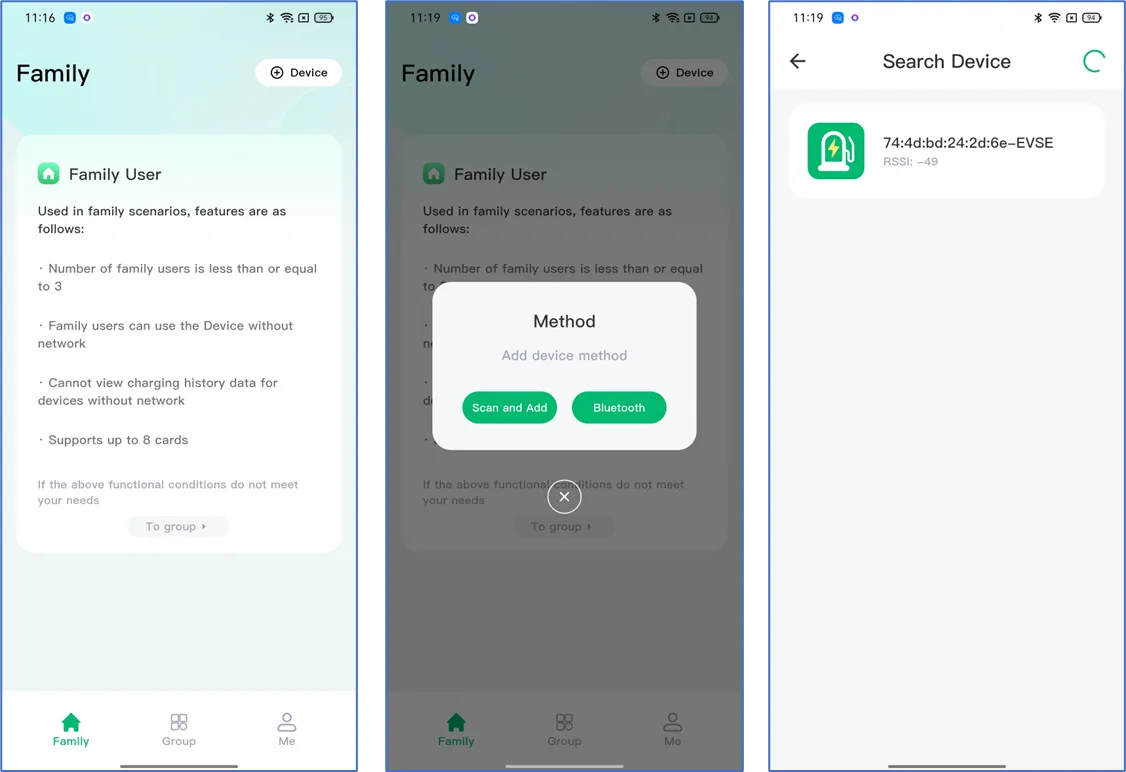
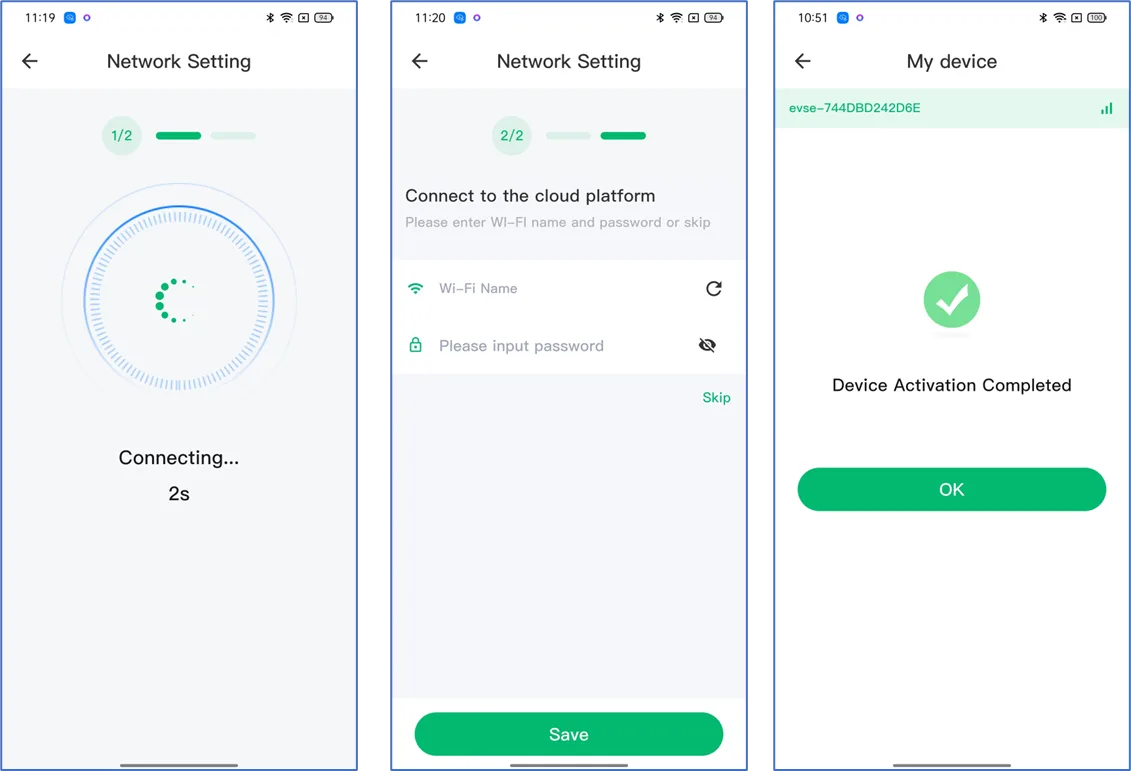
If the device has already been activated and you want to activate it again, reset the device and restart it first. After that, you can activate the device like a new one.
Note: if the device cannot be found, turn the Bluetooth of your phone off and on again.
4. Connect to Cloud Platform
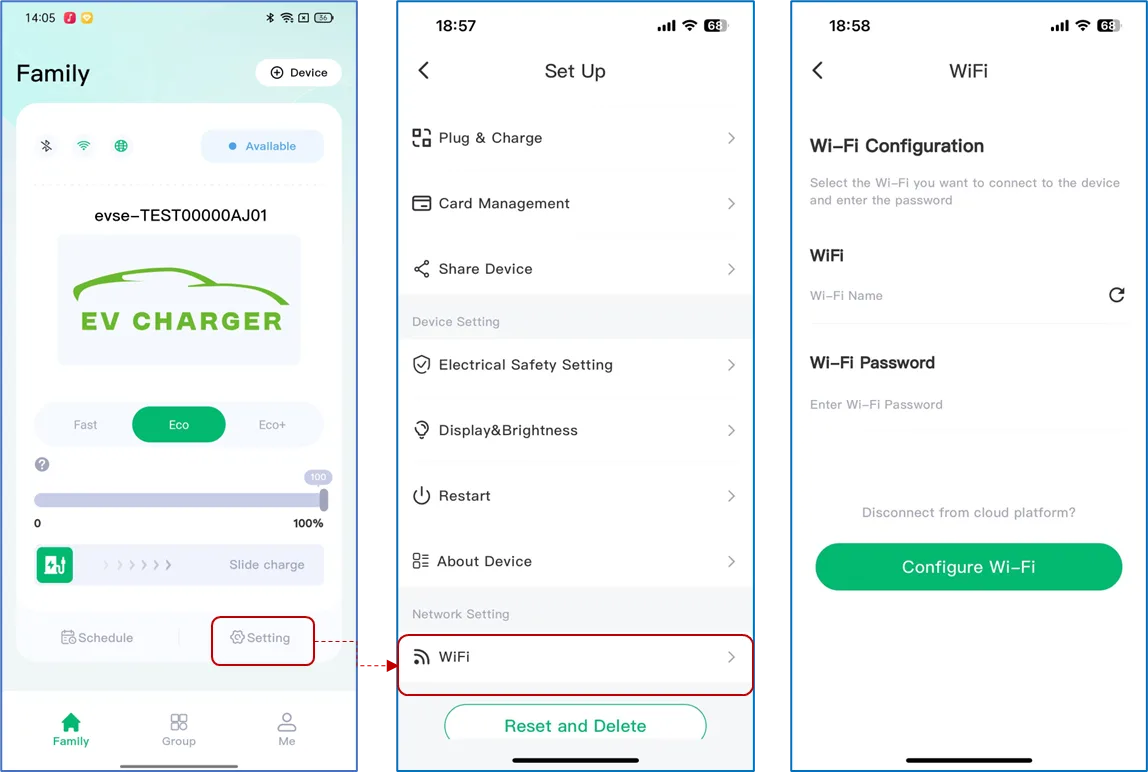
Through the My EV Charger app you can configure the network connection for your charger. Select “Setting” → “Wifi” → “Wifi configuration”, then follow the prompts to enter your Wi-Fi network information.
5. Start / Stop Charging
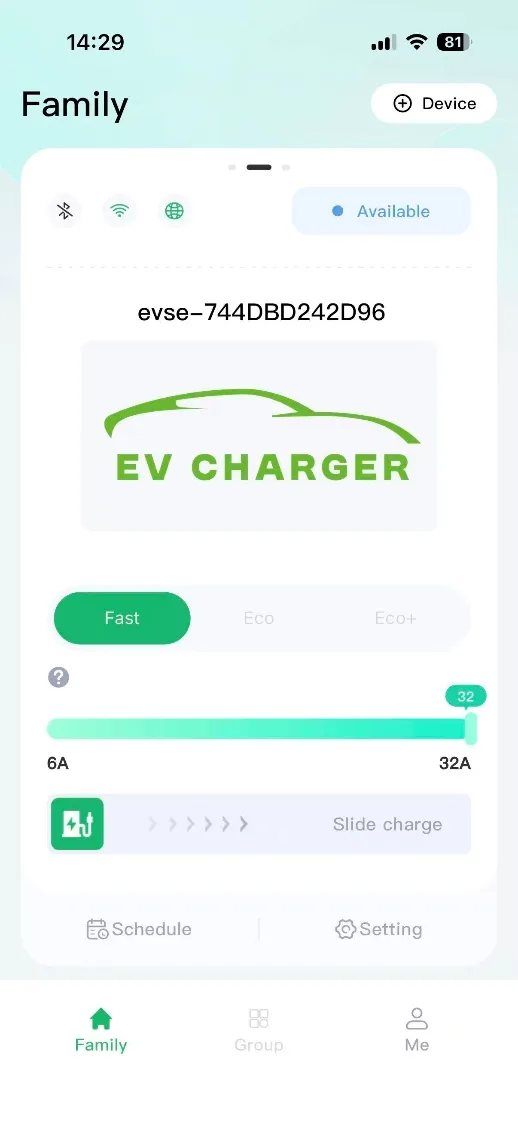
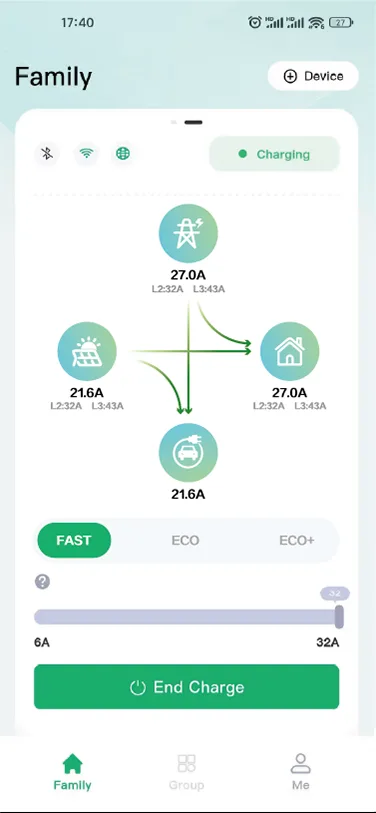
You can start and stop charging from the app. As long as your phone’s Bluetooth connection with the charger is normal, or the charger’s wireless network is connected to the app, the charging data is displayed in real time in the app.
6. Card Management
Through the app you can configure RFID charging cards, enabling the charger to support card charging.
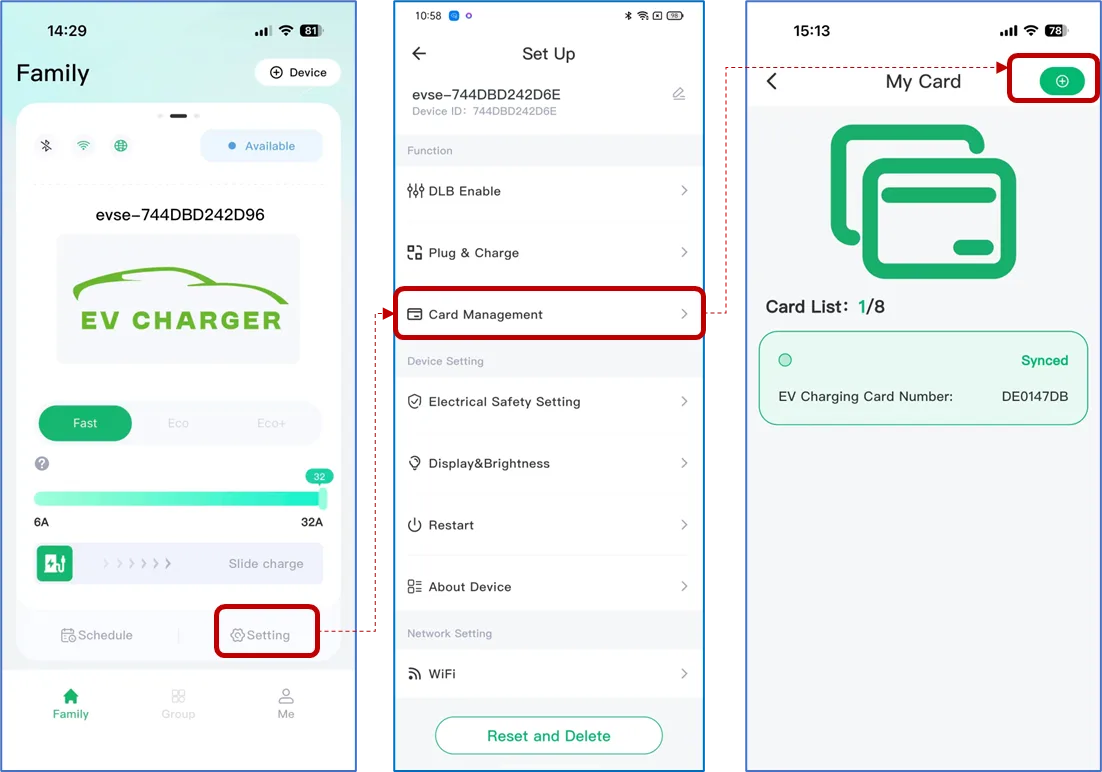
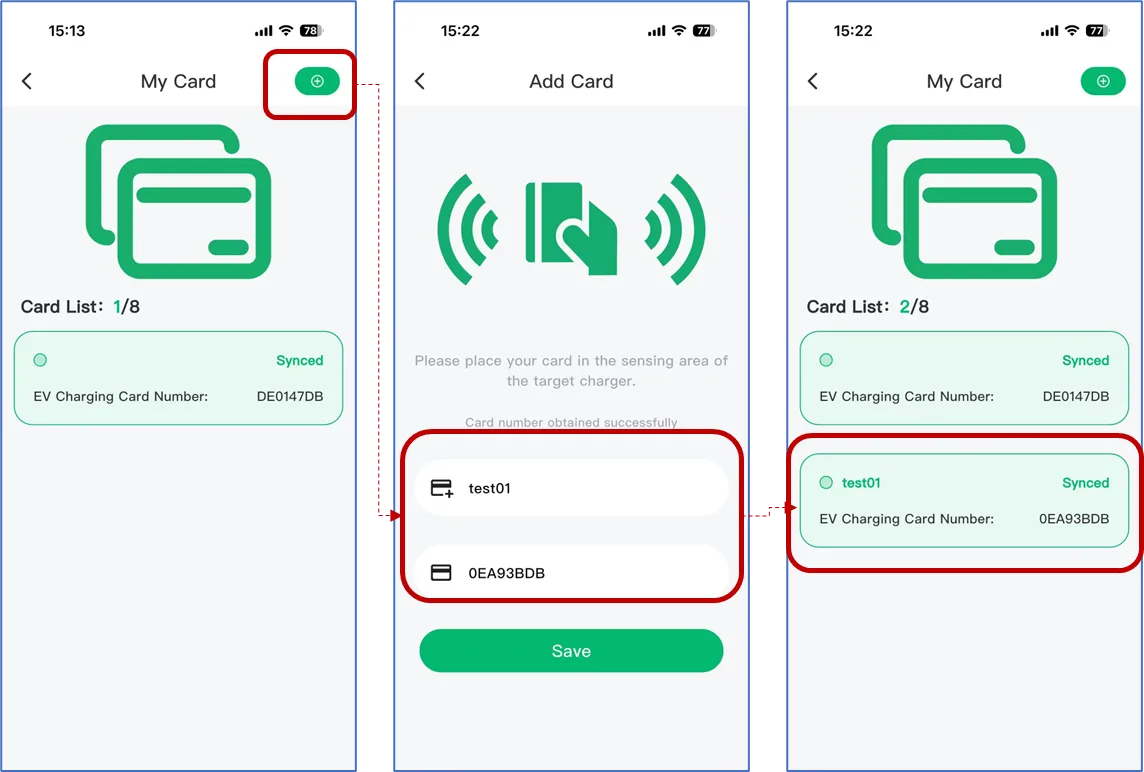
Click the add icon in the top-right corner, tap the card close to the LCD area, and the card ID will be read automatically. You can then name the card as you like. Repeat the same procedure to add up to 8 cards in total.
7. Settings
You can set the charging parameters of the charger, including current, and reset or delete a charger.
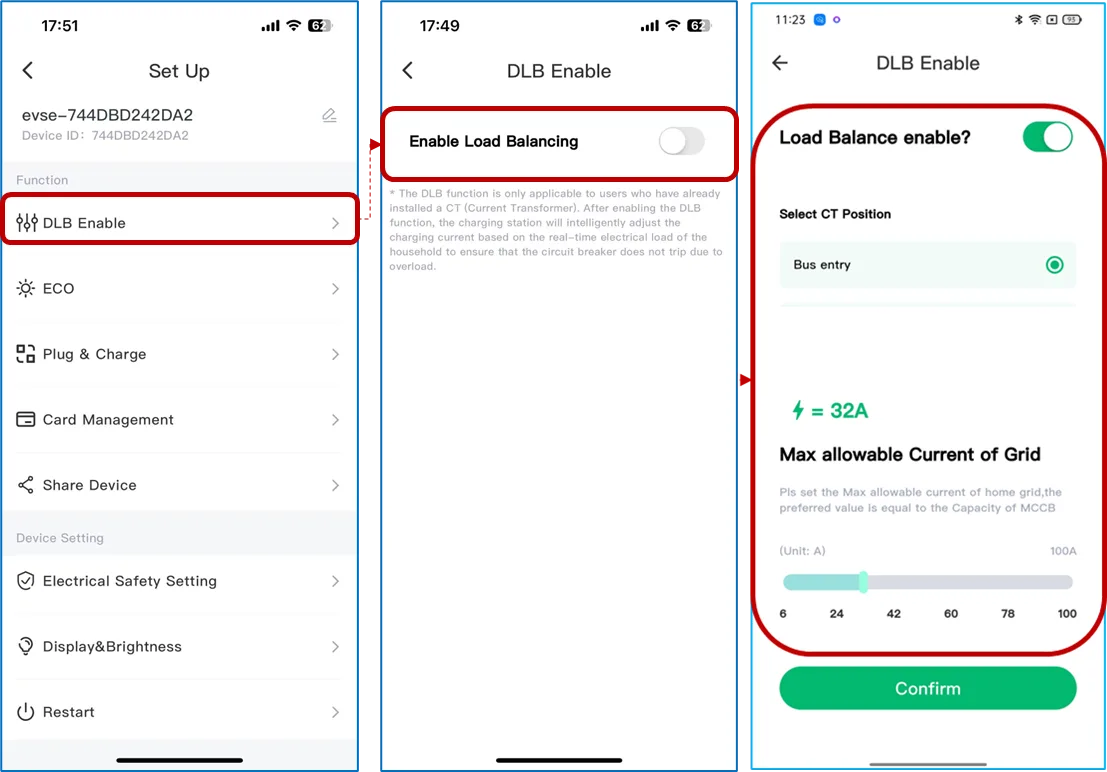
DLB setting
The DLB (dynamic load balance) function is only applicable to users who have already installed a CT (current transformer). After enabling DLB, the charging station intelligently adjusts the charging current based on the real-time electrical load of the household, so the circuit breaker does not trip due to overload.
The maximum grid current must be set correctly — check your household circuit breaker or inquire with the power supply company. During charging, the charger only uses 80% of the maximum grid current.
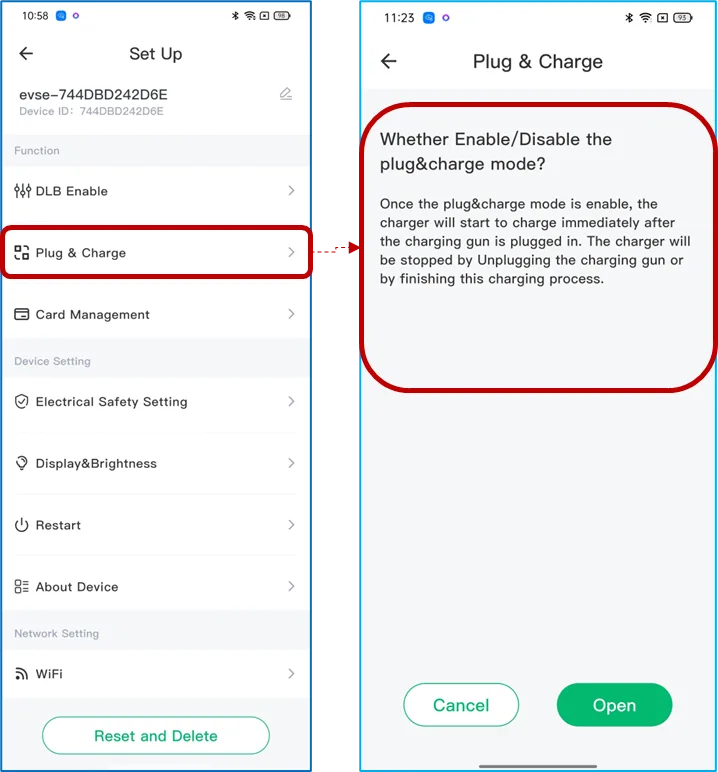
Plug & Charge
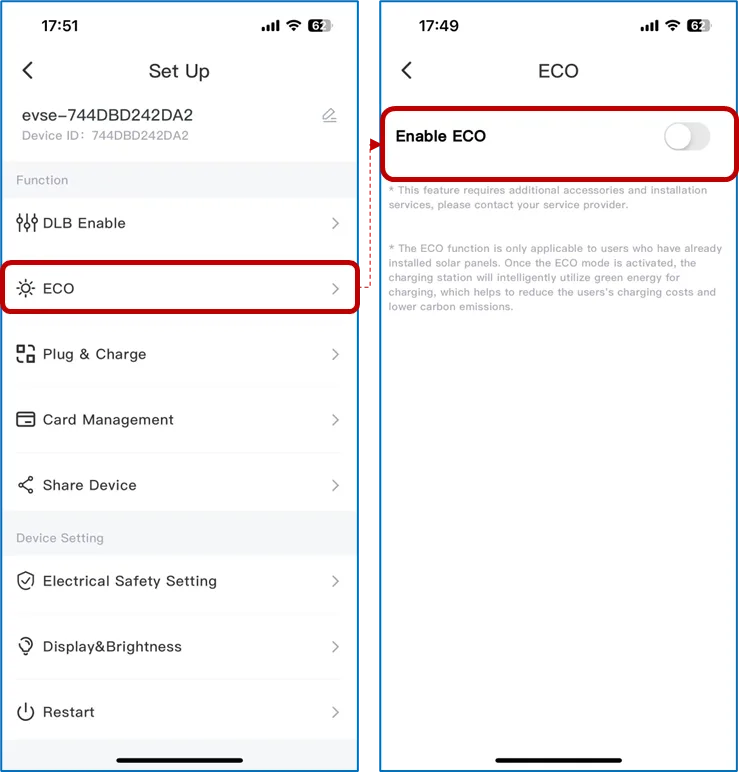
ECO setting
The ECO function is only applicable to users who have already installed solar panels and a CT (current transformer). After enabling ECO, the charging station intelligently utilizes green energy for charging, which helps to reduce charging costs and lower carbon emissions.
Electrical safety setting
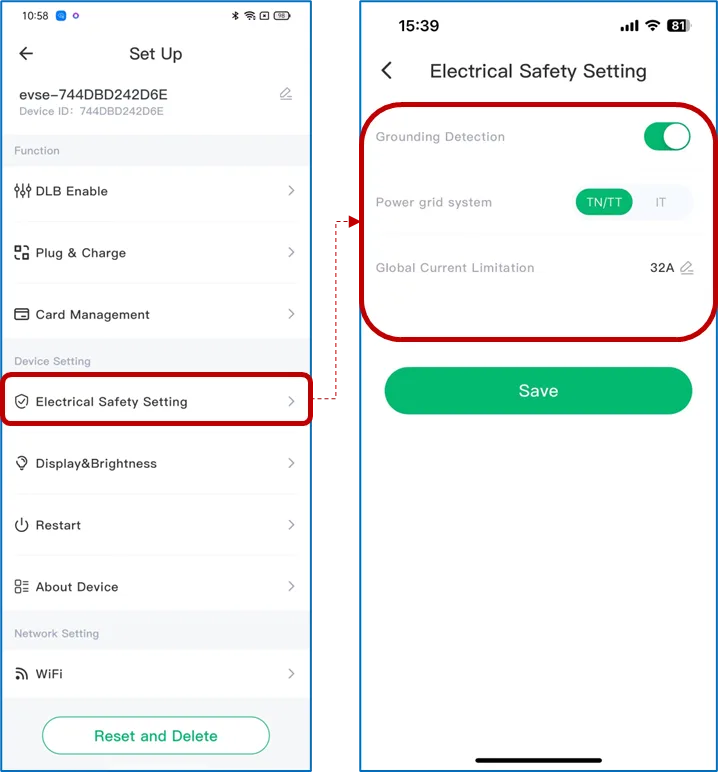
- Grounding detection: we do not recommend turning off the ground wire detection function, but under special circumstances users can turn it off to continue charging.
- Power grid system: select according to the actual power grid system; the default is the TN/TT system. For a dual-live input power supply (L1, L2, PE) without a neutral line, such as the U.S. grid, select the IT system.
- Global current limitation: set the maximum allowable output current of the charger to avoid tripping due to overload.
Restart
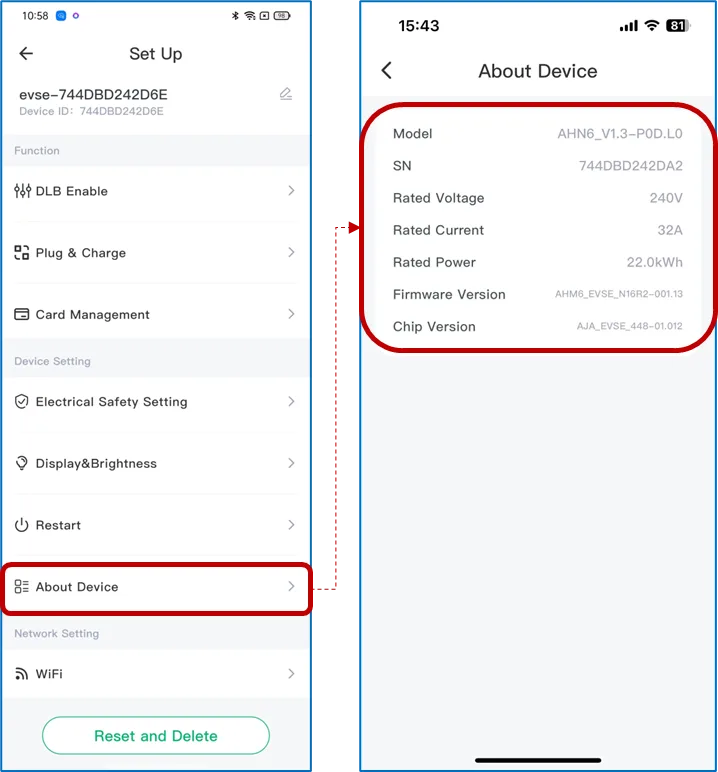
About device
Check the details of the device.
8. Charging Modes
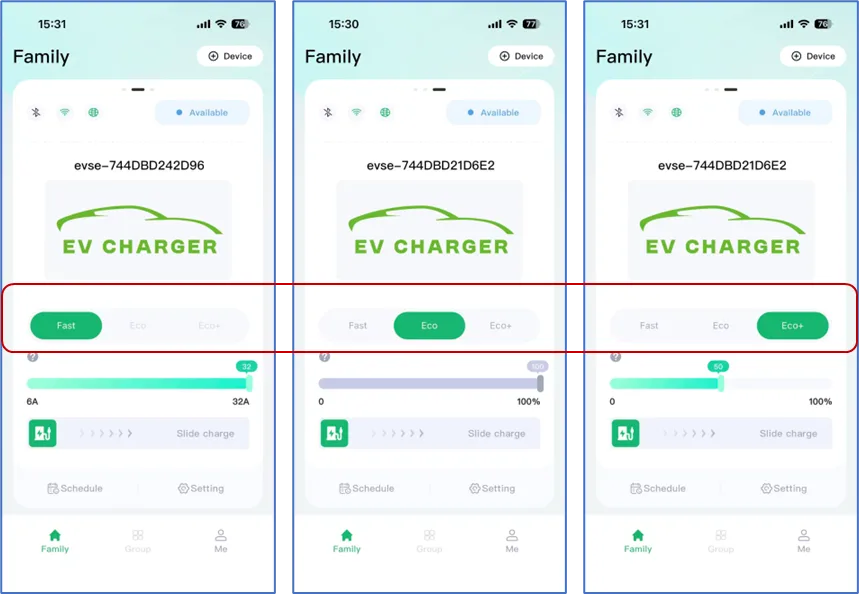
There are three modes to choose from: “Fast”, “ECO” and “ECO+”.
Fast is the default mode. In fast mode, as long as the charging current does not exceed the maximum current of the power grid, the charging station charges with the set maximum current. After the DLB function is enabled, if the power of household appliances increases and the total current exceeds the maximum grid current, the charging current decreases correspondingly.
To activate ECO mode, a solar energy system must be installed in advance (for installation, contact your local authorized installer). In this mode, charging starts automatically as soon as the PV system delivers enough power. The charging power is continuously adjusted so that no power is drawn from the grid if possible. If the PV system no longer delivers enough power, or household consumption increases, charging is paused and continued later.
In contrast to ECO mode, ECO+ never interrupts charging. If the PV power does not meet the minimum charging power of the car (6 A), the difference is supplemented from the grid to continue charging. If the PV power increases, the charging power is correspondingly increased.
9. Schedule Setting
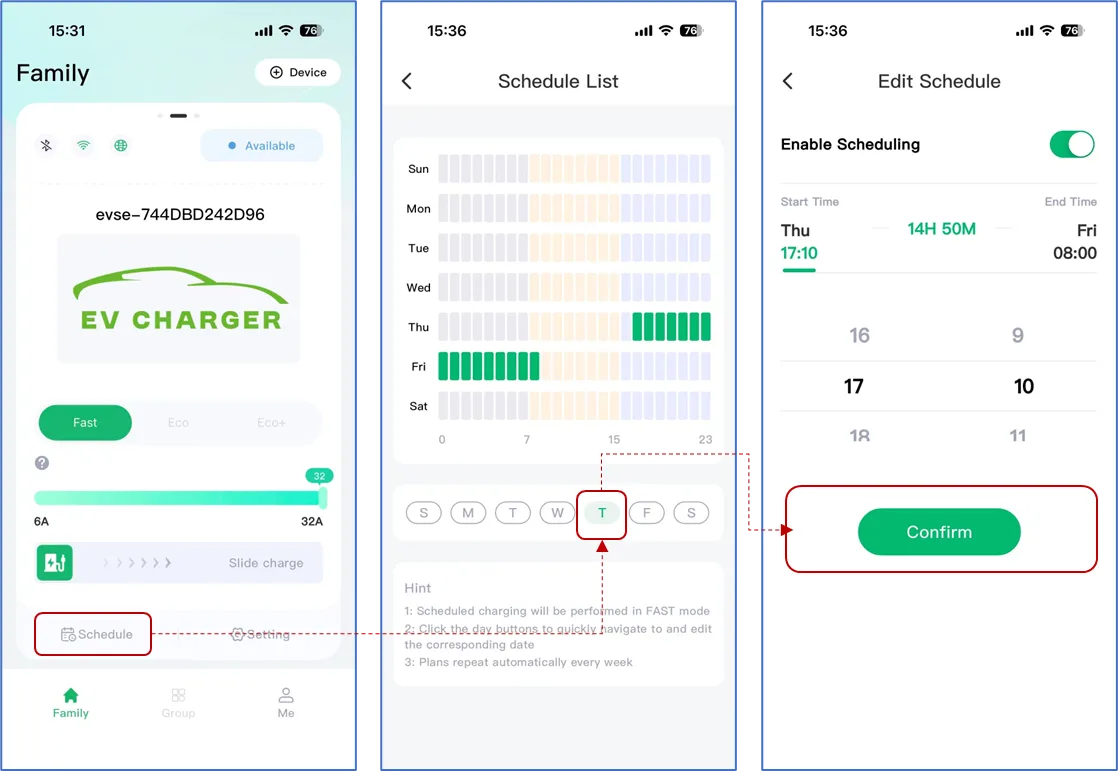
After you set the scheduled charging time in the app, the charger starts charging within the preset time window.
- It can be a single scheduled charge or a periodic one, on a Monday-to-Sunday cycle.
- The schedule only sets the start and stop times of the charging station; it is independent of the charging mode.
- After setting the schedule, check and confirm that the current charging mode is the one you want.
10. OTA
Make sure the charger is connected to Wi-Fi, then click “OTA” to upgrade the charger firmware online to the latest version.
11. Language
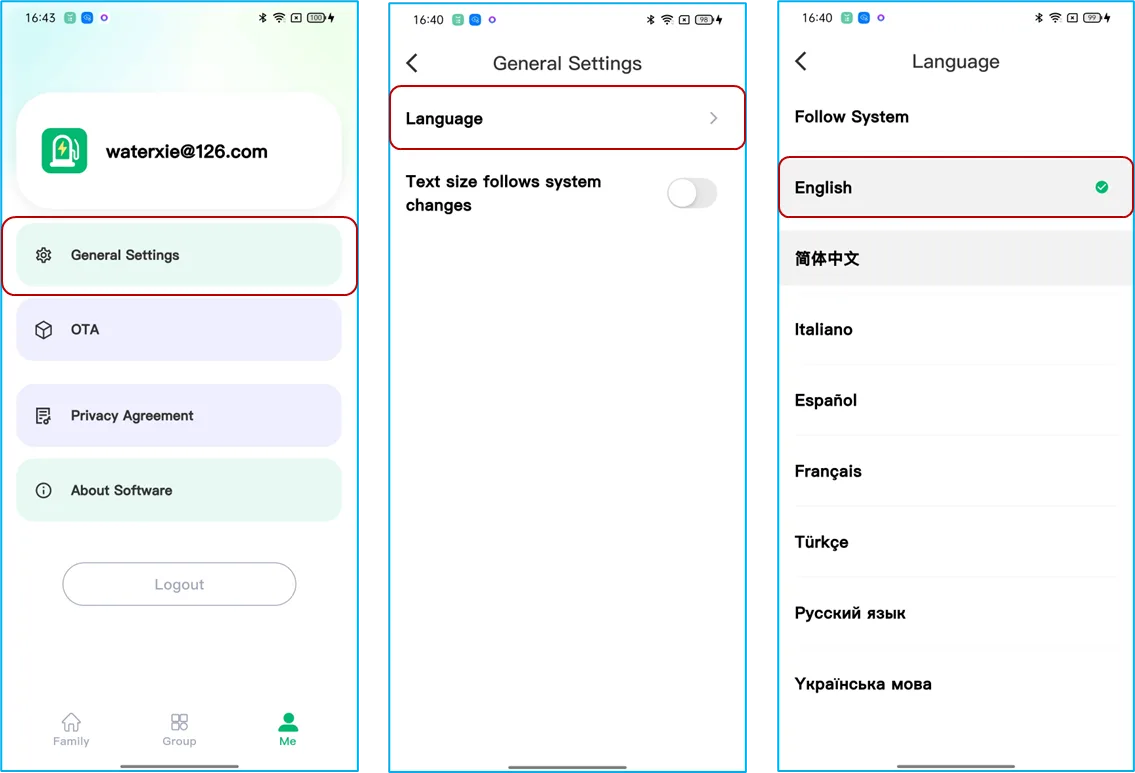
Click “Language” to set the language of the app. Currently supported languages include English, Simplified Chinese, Italian, Turkish, Russian and more.
12. Privacy Agreement
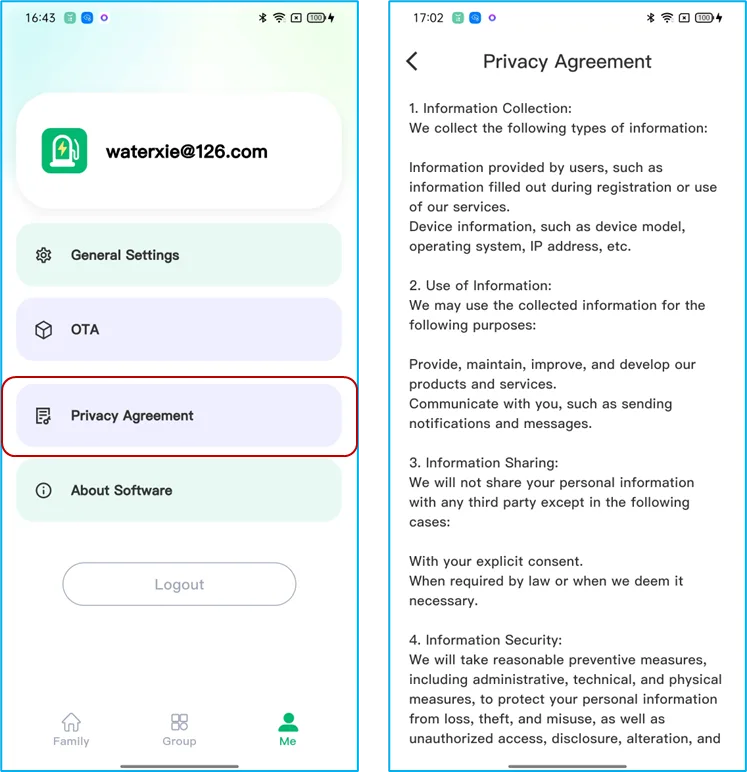
We respect and protect your privacy. Click “Privacy Agreement” to view our privacy policy.
13. Software Update
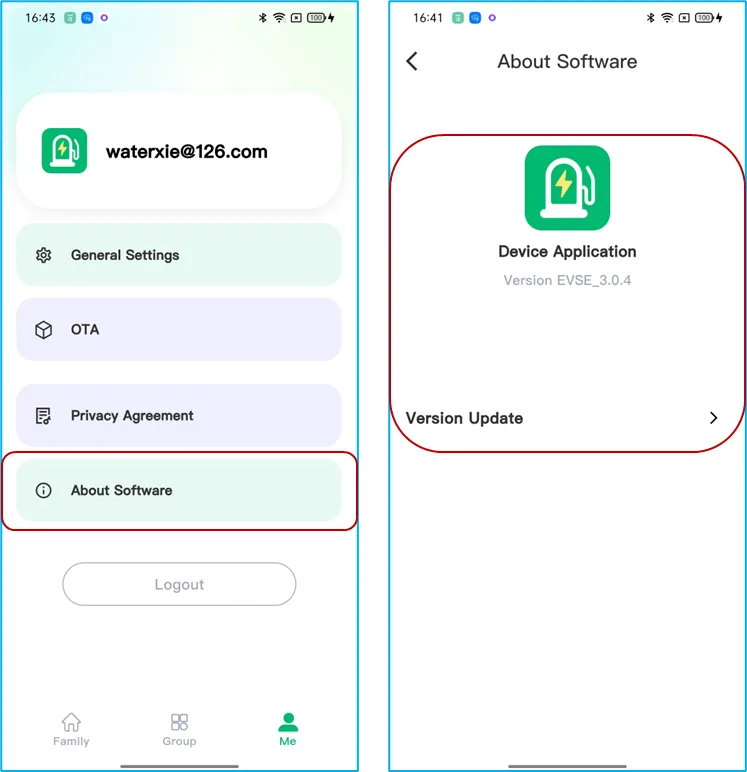
“About Software” displays the current app version and supports online version updates.